Cold ground drains body heat faster than freezing air. When winter temperatures drop below 20 degrees Fahrenheit (-7 degrees Celsius), your sleeping bag alone cannot prevent conductive heat loss to the frozen earth or snowpack beneath your shelter. Surviving sub-freezing nights comfortably requires treating your sleep system as an engineered stack of thermal barriers, moisture interceptors, and dead-air traps.
Every piece of this system interacts directly with the others. If your ground pads lack adequate thermal resistance, compressed sleeping bag insulation underneath your torso renders a zero-degree bag useless. If your shell fabrics trap perspiration, internal moisture destroys your insulation loft by day three of an expedition. Dialing in a winter sleep kit requires understanding standardized thermal ratings, structural pad layering, dew point manipulation between down and synthetic fills, and basic shelter ventilation mechanics.
Understanding ASTM R-Value Ratings on Frozen Ground
Thermal resistance in sleeping pads is measured under the ASTM F3340-18 standard. This testing protocol sandwiches a pad between two metal plates: a bottom plate chilled to simulate cold ground and a top plate heated to human skin temperature. A sensor measures the electrical energy required to keep the top plate warm. The resulting figure is the pad's R-value, a direct measure of its capacity to resist conductive heat flow. The higher the number, the better the pad stops your body heat from radiating into the terrain.
For three-season backpacking on warm soil, an R-value between 2.0 and 3.2 is adequate. When setting up camp on snow, permafrost, or frozen rock, conductive heat loss accelerates dramatically. Deep winter camping requires a total system R-value of at least 5.0, with 6.5 to 8.0 preferred for prolonged sub-zero conditions. Sleep pads rated below 4.5 permit cold spots at your hips and shoulders, where your body weight compresses the pad material and reduces internal air pocket depth.
| Ground Condition | Minimum Target R-Value | Typical Temperature Threshold | Recommended Setup |
|---|---|---|---|
| Hard-packed snow or frozen soil | 5.0 to 5.5 | 20°F to 30°F (-6°C to -1°C) | High-R insulated air pad alone or stacked with light CCF |
| Consolidated glacial ice or sub-zero snowpack | 6.0 to 7.0 | 0°F to 20°F (-18°C to -7°C) | Closed-cell foam pad plus thick insulated inflatable pad |
| Deep sub-zero continental winter | 7.5 or higher | Below 0°F (Below -18°C) | High-density CCF base plus extreme-condition reflective air pad |
The standard ensures that ratings across different manufacturers are directly comparable. In the past, companies used proprietary testing protocols, which resulted in mismatched thermal expectations in the field. When planning an outing, check for the ASTM F3340-18 mark on your pad packaging. Do not rely on manufacturer estimates that use qualitative phrases like "extreme warmth" without an official test number.
Dual Pad Stacking to Stop Conductive Heat Loss
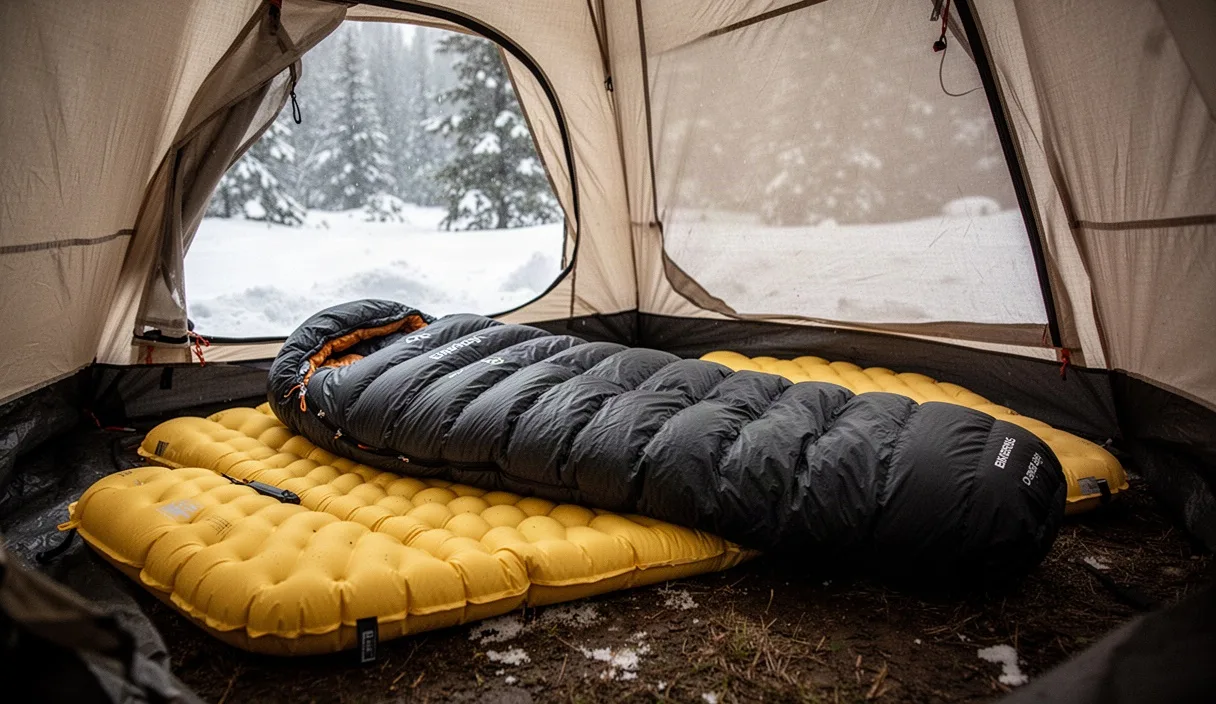
Pad stacking combines two distinct pad technologies: a closed-cell foam (CCF) mat and an insulated inflatable mattress. R-values are directly additive. Laying an accordion-style CCF pad with an R-value of 2.0 beneath an insulated inflatable pad with an R-value of 4.8 creates a combined thermal barrier of R-6.8. This stacked arrangement prevents the air chambers inside the inflatable mattress from dropping to ambient ground temperature.
Placement order matters for efficiency and gear longevity. Place the closed-cell foam pad directly on the snow or frozen shelter floor, with the inflatable pad rested on top. The foam base serves three distinct functions:
- It creates a puncture barrier that shields your inflatable pad from hidden ice shards, frozen twigs, and sharp rock points.
- It stops the thermal shock of freezing snow from chilling the inflatable pad base, which preserves the performance of internal reflective films.
- It prevents the inflatable pad from skidding across slippery nylon tent floors or frozen snow benches.
Some winter travelers experiment with placing the CCF pad on top of the air mattress. While this can provide a faster initial sensation of warmth by reflecting body heat straight back to the sleeper, it exposes the expensive inflatable pad below to punctures. It also allows cold air within an under-insulated air pad to bypass the foam barrier from the edges. Putting the foam on the bottom remains the most reliable field standard.
Inflate air pads using a dedicated pump sack rather than your mouth. Exhaled breath introduces substantial water vapor into the pad chamber. At sub-freezing temperatures, this moisture condenses, freezes into ice crystals, and destroys the pad internal reflective coatings or synthetic microfibers. A pump sack fills the mattress with dry ambient air, maintaining full loft and preventing valve failure from internal ice formation.
Layering Down Quilts Over Synthetic Mummy Bags
Single heavy sleeping bags rated for negative 20 degrees Fahrenheit (-29 degrees Celsius) are expensive, bulky, and difficult to dry on multiday outings. A modular two-bag system offers greater versatility and superior moisture management. By combining a roomy synthetic quilt or wide synthetic bag over an inner down mummy bag, you create a robust dual-insulation envelope that handles severe cold without collapsing under internal humidity.
This layering strategy relies on thermodynamic dew point physics. During sleep, your body releases between 16 and 32 fluid ounces (0.5 to 1.0 liter) of water vapor through insensible perspiration and respiration. As this warm vapor migrates outward through the sleeping bag insulation toward the sub-freezing tent air, it hits the dew point, the temperature boundary where gas condenses into liquid water or frost. In a single down bag, this condensation zone often falls within the outer down clusters. Wet down clumps together, loses its structural loft, and ceases to insulate.
Adding a synthetic outer layer pushes the condensation point completely out of the inner down bag and into the synthetic batting. Synthetic insulations, such as continuous-filament polyesters, maintain their structure and retain thermal performance even when wet. During multi-day trips in freezing weather, moisture forms harmlessly as frost on the tips of the synthetic fibers or on the outer shell fabric, where it can be shaken off in the morning before breaking camp.
Calculating Temperature Ratings for Layered Bags
Layering two sleeping bags yields a temperature rating lower than the simple sum of their individual ratings. A reliable field formula for combining two bags is:
Combined Rating = Rating of Bag A - (70 - Rating of Bag B) / 2
Assume your inner down mummy bag is rated for 20 degrees Fahrenheit (-7 degrees Celsius) and your outer synthetic quilt is rated for 45 degrees Fahrenheit (7 degrees Celsius). The calculation runs as follows: 20 - (70 - 45) / 2 = 20 - 12.5 = 7.5 degrees Fahrenheit (-14 degrees Celsius). Adjusting fit is critical to realizing this target:
- Ensure the inner bag fits close to the body without tight constrictions around the shoulders, knees, and feet.
- Size the outer bag or quilt wider and longer than your inner mummy bag to prevent compressing the down underneath it.
- Secure the outer quilt to the edges of the sleeping pad with elastic straps to eliminate perimeter drafts when you roll over.
Managing Breath Condensation Inside the Shelter
Exhaled breath is the primary driver of internal shelter frost. A human breath contains nearly 100 percent relative humidity at body temperature. When you exhale into a sub-freezing shelter, that vapor immediately moves toward cold surfaces: the tent walls, your sleeping bag shell, and your jacket. Within minutes, it sublimates into needle ice or fine frost flakes that drop down whenever wind strikes the tent fly.
Never tuck your head, nose, or mouth inside your sleeping bag hood. Breathing directly into your bag saturates the insulation near your chest and neck within hours. Use an adjustable balaclava, a neck gaiter, and an insulated hood to keep your face and head warm while venting your mouth cleanly into the open air of the tent. If ice accumulates on your collar, drape a small, quick-drying fleece cloth over your upper chest to catch exhaled breath as frost before it penetrates the sleeping shell.
Ventilating your shelter is mandatory, even during intense blizzards. Cross-ventilation lowers the absolute humidity inside the living space by allowing buoyant, moisture-laden air to exit through top vents while drawing in drier, colder outside air through low perimeters. Keep at least two opposing ceiling vents propped open completely. On double-wall shelters, pitch the outer fly tautly to maintain a steady air gap of at least 3 inches (7.5 centimeters) between the canopy fabric and the waterproof rain fly. For single-wall mountaineering tents, wipe down interior frost walls with an absorbent pack towel every morning before lighting a cookstove.
Checklist for Nighttime Thermal Regulation
Thermal balance is dynamic. Going to bed shivering forces your metabolism to burn emergency calories to warm up your sleep envelope. Going to bed overheating induces perspiration, which saturates your clothing base layers and guarantees you will wake up cold at 3:00 AM. Run through this systematic checklist every evening thirty minutes before turning in.
- Eat a high-fat snack before bed: Digesting lipids produces a slow, steady metabolic heat release over six to eight hours. Consume cheese, nuts, or buttered hot chocolate right before entering your bag.
- Drink hot water and use a sealed bottle: Fill an uninsulated, high-density polyethylene or metal water bottle with boiling water. Check that the cap is leak-free, slide the bottle into an insulated sock, and drop it into the footbox of your sleeping bag fifteen minutes before bedtime to preheat the insulation.
- Change out of daytime clothing: Even base layers that feel dry retain moisture from daytime activity. Strip completely down and put on a dedicated, dry set of heavyweight wool or synthetic sleep-only thermal underwear, along with dry wool socks and a clean fleece beanie.
- Shake out your loft: Unpack your down mummy bag and synthetic quilt thirty minutes before sleeping. Give both pieces an aggressive shake to open up the baffles and let the insulations expand to their maximum loft height before you crawl in.
- Empty your bladder immediately before sleeping: Your body spends significant metabolic energy maintaining warm core temperatures across a full bladder. Peeing immediately before getting in the bag allows that thermal energy to focus on peripheral circulation instead.
- Store critical gear inside the bag footbox: Place your boot liners, water filter, satellite messenger, headlamp batteries, and socks into a breathable storage sack and slide them to the bottom of your bag so they do not freeze solid overnight.
Common Mistakes
A frequent error is wearing excessive bulky layers inside a mummy bag. Putting on a puffy down jacket inside a closely cut bag compresses the bag interior baffles. The outer layer of the jacket pushes against the bag inner shell, reducing the trapped dead-air space and lowering overall insulation. If you must wear a down jacket to bed, spread it loosely over your torso like a blanket inside the bag, or wear it over your base layer only if the mummy bag has extra girth specifically cut for expedition clothing.
Another dangerous mistake is storing wet day clothing inside the insulation layers to "dry it out." Unless you are utilizing a specialized vapor barrier liner (VBL) protocol, body heat drives the moisture out of your damp socks or gloves and directly into your sleeping bag down clusters. Dry your clothing by airing it under shelter peaks on dry, breezy evenings, or keep it packed until you can dry it with camp stoves or the next day's sunlight.
Next Steps in the Field
Do not test an untested winter sleep system in remote backcountry territory where deep sub-zero conditions present hypothermia risks. Test your stacked pads, layered bags, and ventilation techniques in an accessible, low-stakes environment first, such as a backyard, an open vehicle camping site, or within a mile of a winter trailhead.
Take notes on your internal warmth, any cold spots along the torso or feet, and the presence of frost on your bag shell come morning. If you wake up with a damp outer shell, widen your quilt adjustments or increase top-tent ventilation. If your hips ache from cold, replace your lower pad with a foam layer with a higher R-value. Adjust your gear piece by piece until your system keeps you consistently warm and dry throughout the night.