Gear breaks when loaded hard. A snapped pole section at dusk or an L-shaped tear across a shelter canopy can end an expedition if your kit holds only duct tape and wishful thinking. Field repairs demand matched chemistries, mechanical leverage, and materials that bond instantly to dirty, freezing surfaces. Build a kit tailored to the precise fabrics and hardware in your pack, not a generic blister pack from a big-box store.
Every item carried must perform at least two distinct mechanical or adhesive tasks, or resolve a failure mode that causes immediate exposure risk. You do not need five yards of heavy tape when three feet of structural laminate and a vial of dedicated sealant will handle high-wind loads. The following components form a modular defense system engineered around standard backcountry failures: torn canopies, fractured aluminum poles, deflated mattresses, and split coil zippers.
Crucial Adhesives and Seam Tapes for Silnylon
Silicone-impregnated nylon resists water by repelling polar molecules, which also means standard acrylic adhesives and polyurethane tapes roll right off it. Applying standard duct tape or classic Tenacious Tape to a silnylon tarp will fail the moment the canopy tensions under wind. Silnylon demands silicone-based elastomeric sealants or pressure-sensitive adhesives formulated with dedicated polysiloxane compounds.
For wet field use, carry Gear Aid Seam Grip SIL, formerly known as SilNet. This moisture-curing liquid silicone bonds directly into silicone-treated fibers, maintaining flexibility down to -20 degrees Celsius. In freezing or driving rain where a 12-hour cure time is impossible, utilize specialized silnylon repair tape patches backed with cross-linked silicone adhesives. These patches stick on contact to dry silicone fabric and hold under moderate guyline tension until you return to base camp.
| Adhesive or Tape Type | Compatible Substrates | Cure or Tack Time | Shear Strength Rating | Cold Limit |
|---|---|---|---|---|
| Silicone Elastomer Tube (Seam Grip SIL) | Pure silnylon, silpoly, silicone tarps | 8 to 14 hours | High (chemically bonded) | -29 degrees C |
| Silicone-Adhesive Patch (Tenacious Tape Silnylon) | Silnylon, silpoly, silicone flysheets | Instant (full bond in 24 hrs) | Moderate (peel sensitive) | -15 degrees C |
| Polyurethane Liquid (Seam Grip WP) | PU-coated nylon, Cordura, pack bottoms | 10 to 12 hours | Very High (structural) | -30 degrees C |
| Standard TPU Tape (Tenacious Tape Clean) | PU polyester, event, vinyl, air pads | Instant | High (on clean surfaces) | -20 degrees C |
Apply field patches to silnylon following a strict surface-prep sequence. If you skip cleaning, the patch sticks to trail dust rather than the fiber matrix, peeling under the first gust of wind.
- Wipe the damaged zone with an isopropyl alcohol prep pad to lift trail dirt and body oils. Let the solvent evaporate completely for two minutes.
- Flatten the tear against a hard, smooth surface such as a water bottle flank or bear canister lid. Align the torn threads so no gaps remain.
- Cut a circular patch from your silicone repair tape, leaving at least 25 millimeters of clearance beyond every edge of the cut. Rounded corners prevent corner lifting.
- Firmly press the patch from the center outward to displace air pockets. Rub the perimeter with a smooth plastic edge to activate the pressure-sensitive compound.
- For tears under high guyline load, apply a thin bead of liquid silicone sealant along the outer patch seam if rain has stopped, and allow it to dry unweighted.
Tent Pole Splints and Structural Splices
Aluminum pole failure typically occurs at the ferrule joints or through localized wall buckling caused by sudden wind sheer. A split pole section presents sharp edges that slice rainflies and inner tent mesh within seconds. Immediate stabilization requires isolating the jagged break, restoring structural stiffness, and securing the internal shock cord.
The core of your mechanical repair inventory is an extruded aluminum pole repair sleeve. The internal diameter of this sleeve must match your pole outer diameter with no more than 1.5 millimeters of play. Common expedition poles from DAC or Easton measure 8.5 millimeters, 9.0 millimeters, or 10.2 millimeters in diameter. A sleeve with too much internal clearance creates an eccentric load point, causing the pole to kink again immediately adjacent to the repair.
Execute an emergency splint using the sleeve method:
- Release tension on the shelter immediately to prevent fabric puncture. Slide the pole out of the canopy sleeve or clip hardware.
- File or blunt any razor-sharp fractured edges using the diamond file on your micro multi-tool, or crush flared aluminum flat with the tool pliers.
- Slide the aluminum repair sleeve over the pole segment until it centers directly over the fractured point. The break must rest in the middle of the sleeve.
- Wrap four tight wraps of reinforced vinyl or fiberglass-filament tape around the pole at both ends of the sleeve. This stops the sleeve from sliding along the shaft during wind flex.
- If the pole has bent without breaking, do not bend it back cold in the field. Bending cold aluminum introduces severe work-hardening micro-fractures, snapping the tube immediately. Splint over the curved section as it sits.
When an aluminum sleeve is missing or sized incorrectly, build a structural splint using an aluminum Y-stake or titanium shepherd hook stake. Seat the spine of the stake flat against the fractured pole segment. Bind the assembly tightly along its entire length using five feet of 1.5-millimeter Dyneema cord, tensioned with continuous round turns and finished with three half-hitches. Ensure the cord does not snag the shelter pole sleeve during reinsertion.
Air Pad Puncture Repair in Wet Conditions
An uninsulated ground pad that loses pressure robs body heat faster than wet clothing. Locating a pinhole puncture on a muddy, rain-soaked shelter floor presents a significant technical challenge because air bubbles are masked by ambient moisture and dark fabric coatings.
Locate leaks efficiently through acoustic and pressure isolation. Inflate the pad until rigid. Fold the pad in half to double the internal pressure, then slowly run your cheek or inner wrist two centimeters above the fabric surface. Skin in these areas detects temperature drops caused by escaping air. If the puncture remains hidden, mix three drops of concentrated camp soap with 50 milliliters of water in your cook pot, smear the lather across the baffled surfaces, and watch for cluster bubbling.
Wet bonding requires distinct chemistry. Moisture ruins standard polyurethane contact glues if applied directly over damp laminate. Follow these steps to seal punctures under active precipitation inside your shelter:
- Deflate the pad completely. Dry a four-centimeter perimeter around the hole using a camp towel, followed immediately by an alcohol prep wipe to strip water films.
- Warm the repair site by pressing your bare hand against the fabric for 60 seconds. This drives off residual microscopic moisture from the weave.
- Select an adhesive patch matched to pad construction. For thermoplastic polyurethane (TPU) films, use an aggressive self-adhesive patch such as a pre-cut clear TPU strip.
- Remove the release liner and apply firm, direct thumb pressure to the patch for three full minutes. Work from the puncture outward to prevent micro-channels of escaping air.
- If the hole sits along a baffled weld seam or textured surface, clear tape will not seal flat. Apply a drop of UV-curing resin or fast-curing moisture-activated polyurethane adhesive. Anchor the pad flat and allow at least four hours of setting time before applying body weight.
Zipper Slider Replacements and Jam Removal
Shelter and bivy zipper failures stem from two root causes: mechanical spread of the zinc slider body, or fabric caught inside the slider throat. Spiral coil zippers (common on tents, rated as #3 or #5 reverse coil) do not fail because the plastic coils disintegrate; they fail because the slider sidewalls expand under load, losing the pinch required to interlock the teeth.
When a zipper separates behind the slider, do not violently force the pull back and forth. Forcing the slide strips coil stitches from the woven carrier tape, destroying the shelter permanently. Instead, service the mechanical tolerance of the existing slider:
- Work the slider back to the open end of the zipper run until both sides of the coil enter the throat evenly.
- Inspect the mouth of the slider. You will likely find the rear gap has splayed open, preventing proper tooth engagement.
- Use the needle-nose pliers from your multi-tool to apply gentle, measured pressure to the cheeks of the slider body. Squeeze one side, then the other, by fractions of a millimeter.
- Test the zip action. If the coils do not mesh, increase clamping pressure incrementally. Avoid over-crimping, which cracks cheap die-cast zinc sliders instantly.
If the zipper slider fractures completely, carry a universal split-body replacement slider or a spare slider matched to the coil size (YKK #3 or #5). To install a standard solid slider in the field, use your multi-tool wire cutters to snip the metal bottom stop off the zipper track. Slide the new slider onto both sides of the coil, verifying tooth alignment. Seal the bottom track by wrapping six turns of heavy polyester thread through the fabric tape just above the cut stop, securing the thread with a drop of cyanoacrylate (super glue) to prevent the slider from running off the end.
To clear jammed canopy fabric from a slider, do not yank the nylon straight out. Pull the trapped fabric backwards, parallel to the zipper teeth, while gently wiggling the slider in reverse. If the fabric is hopelessly wedged inside the internal wedge, lubricate the slider track with a tiny dab of mineral-based lip balm or candle wax, then work the fabric free with the tip of an awl or sewing needle.
Assembly of a 150-Gram Universal Repair Pouch
A functional backcountry repair kit must be compact enough to reside permanently in your pack. A scatter of loose items inside your gear sack leads to lost needles, dried-out glue tubes, and damaged tape rolls. Pack every component into a high-visibility, flat-profile pouch built from Dyneema composite fabric or 70D ripstop nylon.
| Item Description | Quantity or Length | Dedicated Role | Weight (Grams) |
|---|---|---|---|
| Ultralight Dyneema Zip Pouch | 1 unit | Waterproof storage and organization | 11 g |
| Aluminum Pole Splint (8.5 - 9.5 mm ID) | 1 piece (130 mm) | Rigid splint for fractured pole sections | 14 g |
| Silicone Repair Tape (Tenacious Tape Sil) | 1 roll (75 mm x 500 mm) | Tears in silnylon canopies and tarps | 12 g |
| Standard Clear TPU Tape Strips | 4 pre-cut patches | Air pad punctures, PU tent floors, dry bags | 8 g |
| Liquid Polyurethane Adhesive (Seam Grip WP) | 1 mini-tube (7 g) | Permanent seam bonding, boot delamination | 10 g |
| Cyanoacrylate Adhesive (Gel Super Glue) | 1 single-use tube (2 g) | Hard plastic breaks, buckle repair, dry pad holes | 4 g |
| Heavy Bonded Nylon Thread (#69) | 10 meters (on flat card) | Load-bearing harness and pack repairs | 6 g |
| Heavy-Duty Sailmaker Needles (#14 and #18) | 2 needles | Penetrating webbing, canvas, thick coatings | 4 g |
| Replacement YKK #3 and #5 Coil Sliders | 2 units (1 of each) | Tent door and sleeping bag track repair | 6 g |
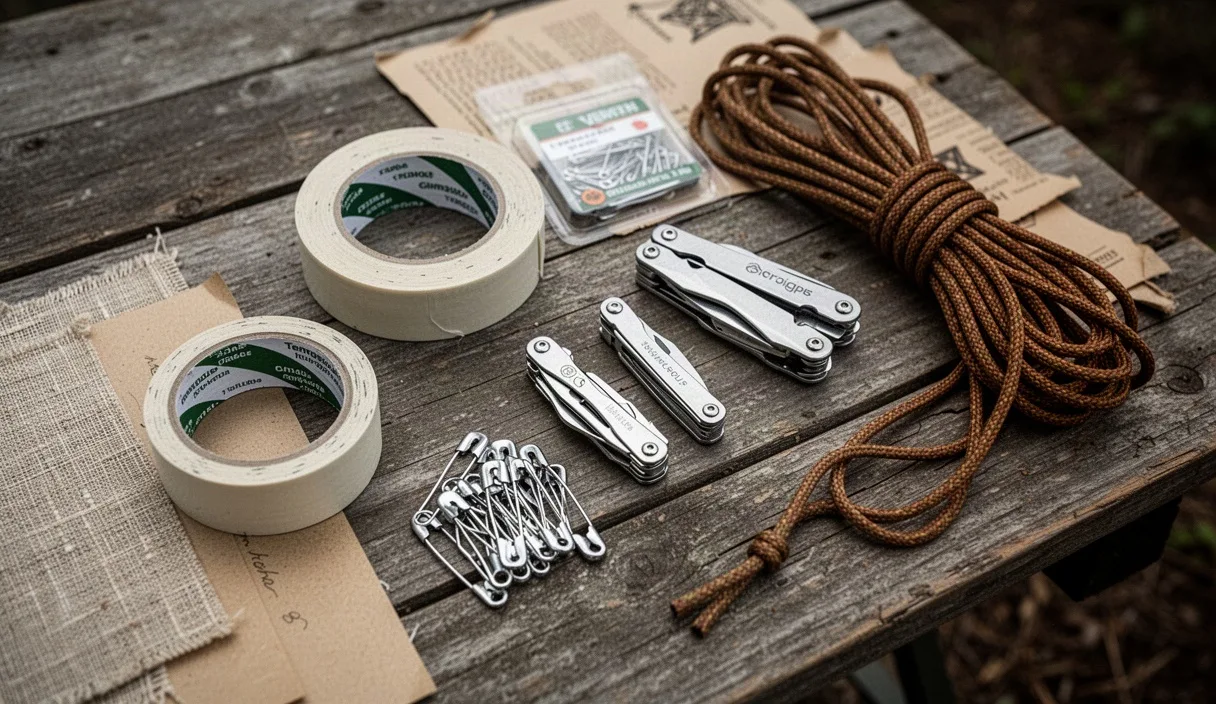
| Field Multi-Tool with Pliers / Wire Cutter | 1 micro tool | Crimp sliders, bend splints, extract needles | 52 g |
| Braided Dyneema Cord (1.5 mm, 150 kg test) | 5 meters | Splint binding, guyline replacement | 8 g |
| Heavy Gauge Steel Safety Pins | 3 units | Temporary seam retention, zipper pulling | 5 g |
| Isopropyl Alcohol Prep Pads | 4 sealed packets | Degreasing surfaces prior to patch application | 8 g |
Total payload for this modular system weighs exactly 148 grams. It handles over 90 percent of non-catastrophic gear breakdowns encountered across alpine, desert, and forest terrain without duplicating functions or wasting pack volume.
Common Mistakes
Most field repair failures result from incorrect materials or poor timing rather than challenging weather conditions. Avoid these recurring mistakes:
- Packing expired or previously opened glue tubes: Polyurethane and cyanoacrylate glues cure upon contact with atmospheric moisture. Once unsealed, an opened tube solidifies within four months on a gear shelf. Always pack factory-sealed micro-tubes for remote outings.
- Using duct tape on structural gear: Duct tape utilizes a rubber-based adhesive that turns gummy under direct sun and loses all grip when soaked. Its woven carrier lacks the tensile strength to hold guyline tabs or fractured poles. Use technical fabric tape or fiberglass-reinforced wraps instead.
- Sewing tears without sealing stitch holes: Thread repairs on pack bodies or tarps create a perforated line that rips easily under load. Always coat field stitching with a flexible sealant to lock the threads and spread the stress across the substrate.
- Over-crimping zipper sliders: Crushing an expanded zipper slider with excessive plier force snaps the cast aluminum or zinc alloy instantly, turning a repairable slider into an unusable piece of junk.
- Neglecting fabric tension during curing: Applying adhesives while a shelter is pitched tight leads to patch slippage and messy, failed bonds. Drop the pitch, release all fabric tension, execute the repair flat, and allow proper cure time before re-tensioning.
Next Steps for Gear Readiness
Inventory your kit today before your next multi-day trip. Unpack your repair pouch, examine your adhesive tubes, and discard any liquid glue older than 12 months. Verify that your pole repair sleeve actually fits the exact diameter of your current shelter poles by doing a test slide over the thinnest and thickest sections of the frame.
Practice sewing a lock-stitch through heavy webbing using your sailmaker needle and pliers on scrap material at home. Learn the exact squeeze pressure required to tension a zipper slider without snapping the metal. Backcountry gear maintenance is a mechanical discipline: having the correct tools on your back matters only if you possess the muscle memory to use them in the dark during a downpour.